BELOW ARE OUR OLD MEASUREMENT INSTRUCTIONS. WE’VE LEFT THEM HERE JUST IN CASE YOU WOULD LIKE A LITTLE MORE ASSISTANCE IN GETTING VERY ACCURATE MEASUREMENTS OR IN CASE ANY OF THE COMMENTS AND RESPONSES ON THIS PAGE MIGHT BE HELPFUL.
*TO VIEW THE NEWER, EASIER MEASURING INSTRUCTIONS PLEASE VIEW HOW TO MEASURE.
——————————————————————————————————————————–
Pictures and Detailed Information on Measuring for your Plissé© Retractable Screen
When measuring for the Screen Solutions, Plissé© you will need to make reasonably accurate measurements of the opening. The pictures below demonstrate the best procedure for gathering those measurements.
How to Measure – Step 1
First decide where in the opening you will install the screen.
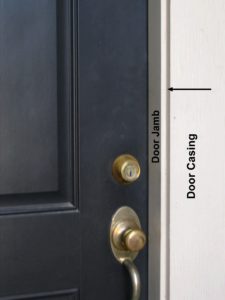
Typically the Plissé© screen frame is mounted in the corner between the door jamb and the door casing as indicated by the arrow in this picture.
The bottom rail rests either on the threshold or on the surface just in front of it.
For help deciding if you will need the optional threshold adapter or figuring where the bottom rail will go click here.
How to Measure – Step 2
By now you should already have printed the Measurement Worksheet and have it close by to record these measurements.
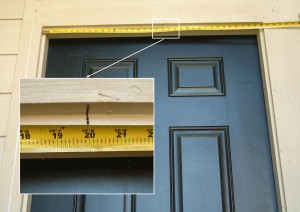
From the left side measure out 20 inches and make a mark.
When the Plissé© is installed it will cover any marks.
How to Measure – Step 3
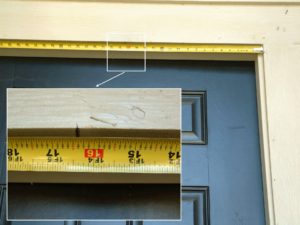
Now measure out from the right side to your mark and record the measurement in inches and sixteenths on your worksheet.
Add that amount to 20 inches. This is your top width measurement.
In the example shown here the measurement from the right side to the mark is 16 3/8 inches. That added to 20, 36 3/8 inches, is the top width measurement for this door.
How to Measure – Step 4
Repeat the same procedure for the bottom measurement.
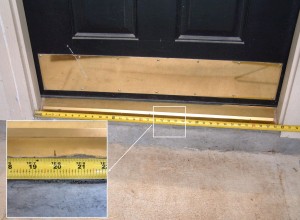
On the left side, at the bottom, make a mark at 20 inches – as shown in the picture to the left.
.
.
.
How to Measure – Step 5
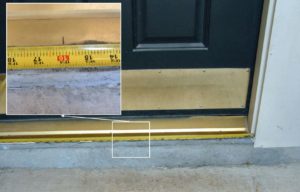
Measure from the right side, at the bottom, to your mark and record on the worksheet.
Add that amount to 20 inches and record it on the worksheet as well.
In this example, the measurement from the right side at the bottom is 16 inches. Added to 20 inches gives a total measurement for the bottom width of 36 inches.
Note that in this example the top and bottom widths are not exactly the same. The Plissé© will easily adapt to this opening, which is 3/8″ larger at the top than the bottom.
How to Measure – Step 6
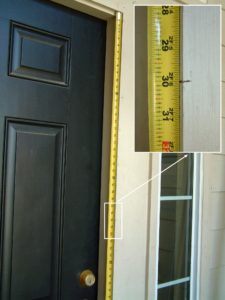
At the right side of the opening, from the top down, measure 30 inches and make a mark.
Repeat on the left side of the opening.
.
.
.
.
.
How to Measure – Step 7
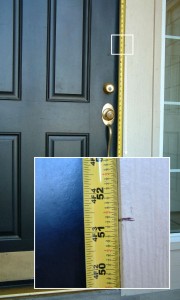
From the bottom of the opening, on the right side, measure up to the mark you made.
Record the measurement on your worksheet.
Add that amount to 30 inches. This is your right side height measurement.
In this example that amount is 51 1/4 inches.
Added to 30 inches, gives a right side total height of 81 1/4 inches.
Repeat for the left side.
You now have all of the measurements needed to order your Plissé© retractable screen. For help deciding if you need the optional threshold adapter click here. Complete the other items on the Order Preparation Worksheet and go to our secure online shopping cart to order.
- See How Easy Installation is … Click Here to see the Easy Installation Slide Show
- Read Customers’ Installation Testimonials … Click Here to Read What Others are Saying about Installing Their own Plissé© Retractable Screens
- Preview the Installation Instructions … Click Here to Preview & Print the Plissé© Installation Instructions

